$24.95 $36.95
| /
NOTE: Z-Wave gateway controller required - sold separately.
We may have this product available in open box, refurbished, or used condition - just check the variant buttons under the product price for availability. All of our recycled inventory has been tested for both manual and Z-Wave control and is fully functional at the time of shipment. Here is what you can expect when ordering your device:
Download the Manual for Zooz Z-Wave Long Range 240V XS Relay ZEN57 800LR (PDF)
NOTE: If you don't see your Z-Wave controller on the list above, please contact us before you purchase this product.
Before installing, make sure the load does not exceed the Wattage provided in the specs. Check your wiring first to confirm that you have all the following wires present in your gang box: load (most often black), line (most often black), neutral (most often white), and ground (most often green).
If you are not comfortable identifying the wiring and following the instructions, please hire a licensed electrician.
Here are some helpful wiring tips:
How to include the 240V XS Relay to your smart home network?
How to add the 240V XS Relay to the Z-Box Hub
How to add the 240V XS Relay to SmartThings
How to add the 240V XS Relay to Home Assistant
How to add the 240V XS Relay to Hubitat
How to add the 240V XS Relay to HomeSeer
SmartStart Inclusion:
Open your hub's app and initiate pairing as usual. Scan the SmartStart QR code on the ZEN57 relay and power it up - it will include automatically. You don't need to click the Z-Wave button unless you're using SmartThings in which case, you may need to activate the relay by tapping the Z-Wave button 3 times quickly.
Manual Inclusion:
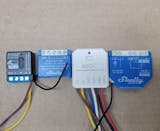
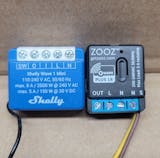
1. I like how small it is. At 1.2” x 1” x 0.6” I think it may be the smallest z-wave relay you can buy. Its even smaller than the Shelly Wave 1 mini. The only drawback to the size is that it has a lower amp rating than the other larger relays which I am ok with since I will only use it for controlling a single light.
2. The size of the relay as well as the pre-wired switch pigtails made it easy to install. All I had to do was disconnect the line and load that were connected to dumb switch and connect them to L and OUT on the ZEN57. Then I connected the 2 neutrals at the back of my box to the 2 neutral terminals on the ZEN57. Then I connected the 2 pigtails to my dumb switch.
3. One other thing I like is that you can change the settings and use the switch inputs for other stuff.
Zen57 Long range Inclusion through zwave-js-ui into HA was quick and easy. Over a few weeks it’s been flawless. I’m using it behind a bathroom light switch bc my Luddite kids want a toggle switch with no delay. With scene control off there is truly no delay. With it on there is perhaps only the very slightest delay which my kids don’t notice. I can only tell by comparison.
Only complaint: On the device page inside zwave-js-ui there is no ‘Help’ option. For other Zooz devices this links to how-to for: Include, Exclude, and Reset plus it provides a link to the manual. I hope this will be added in the future.
I am using this for a remote alarm for our sewer lift station. Associated with the Hubitat easily. Initially i connected the wires across the high level float input terminals. This caused a little confusion for the alarm circuit due to low internal resistance. But upon connecting to the alarm horn circuit, everything worked fine. Now I have a remote alarm, should the pump fail and we get a high level.
The recently released ZEN57 800LR XS Relay fits my use case for monitoring the operation of our sump pump, using an AC current sensing relay and the ZEN57 configured to report the state of a dry contact switch--no other parts or power supplies are needed. The small package size (about the size of a postage stamp) and the convenience of powering it from the 120v AC line make for a small package that can be mounted just about anywhere. Highly recommended!